
Follow along step by step as I'm sewing the Idun dress, view A!

Pattern: The Idun Dress, PDF pattern
Suggested fabrics: Light to medium weight cotton jersey, viscose jersey or similar. Choose a fabric that is more on the firm than on the slippery side. At least 20% stretch on the crossgrain.
My fabric: I'm using a cotton jersey from Stoff & Stil. (Sold out). Cotton/elastane jersey. Around 200 gsm. For reference :)

Now let's get started! Make sure you have your pattern, fabric, thread and tools. And of course you need a sewing machine and scissors and all that good stuff. I'm using an overlocker and a coverstitch machine too but if you don't have those a zigzag stitch and a twin needle on your regular machine will work just as well.
Use a stretch needle in your sewing machine. When sewing with jersey this is important to not break the fabric accidentally. A stretch needle has a rounded point and "slides" through the knit fabric, not breaking threads on its way.
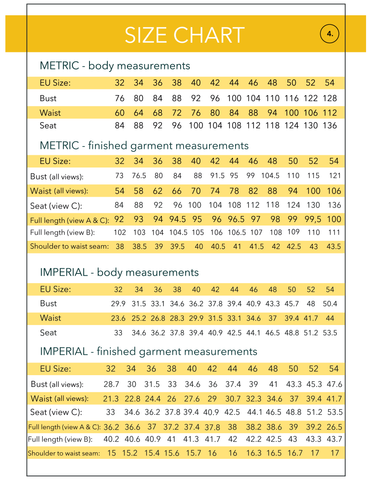
Choose a size using the size guide. Choose the size that is closest to your bust measurement.
Print your pattern.
This is a layered PDF so you can choose the size you want to print and uncheck any sizes you don’t want to print. Open the pattern file in Adobe Reader and select the layers icon on the left. Click the eye icons to make the size(s) you want visible. Make sure to leave the ”Keep selected” layer visible as this contains text, info and tile markings that you need for all sizes.
Make sure your settings are set to “print actual size”, “100%” or “true to scale”. Do not add “fit to paper”. On page 1 of the pattern you will find one test square that is 5 cm and one that is 1.5 inches. Start by only printing page 1. Measure your printed square to ensure your printer didn’t scale your pattern! When you are satisfied you can print the rest of the pattern. Assemble the pages, making sure the diamonds line up.
Prepare your fabric. Prewash your fabric the same way you intend to wash your finished garment. The reason for this step is to prevent shrinking and to detect any problems or kinks with the fabric before you use it. I have had some unpleasant surprises in the past with other fabrics where I've skipped this step and then washed my finished garment, only to find it a few sizes too small when I took it out of the machine... So don't skip this step ;)

Fit: We all have different body shapes and just as with RTW clothes no garment or pattern is made for your exact body. I always suggest you make a toile* before you cut out your fancy fabric. That way you can make adjustments to have a pattern that fits you perfectly to use over and over again.
*A toile is an early version of a finished garment made up in cheap material so that the design can be tested and perfected.
Seam allowances of 0.6 cm, 1/4" are included in the pattern.
Now it’s time to cut or trace out your size! And then start with the actual steps! I cut out my size because I prefer that method. Feel free to trace on tracing paper if that's your jam!
Here's a little video tutorial I made for instagram and to show the different steps. Especially sewing the binding. You can take a look as well as reading the blog post :)
STEP 1. Read through all the steps before you start! Place your pattern on the fabric and pin it in place making sure the grain line is right and there are no wrinkles underneath. Make sure everything is placed right before you cut! Seam allowances of 0.6 cm (1/4”) are included in the pattern. Look at the layplans (separate file) to get an idea of how to optimise your fabric amount for your size.
Measure the distance from the grain line at two points to the fabric selvage to ensure the pattern piece is placed correctly directly on the grain line.


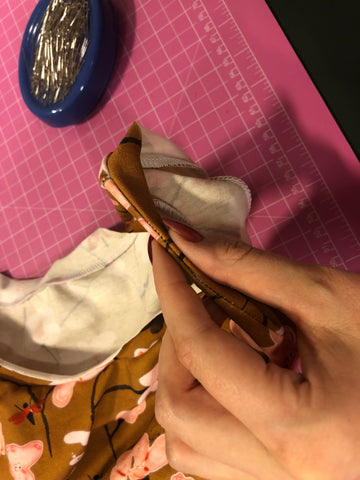
STEP 2. Mark notches by cutting into the seam allowances a few mm. Notches are marked as triangles on the pattern pieces.


I place a pin at the dart point like this:
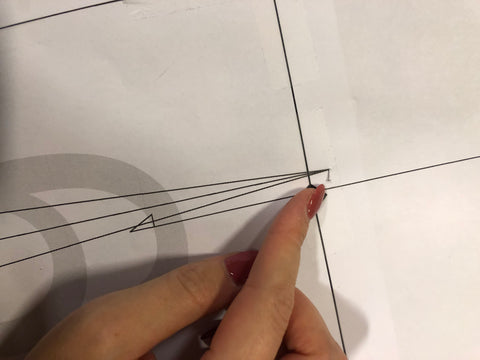
Then I place another pin at the same place from the other side when I remove the paper pattern.

Then when I pull the fabric apart I have marked the dart points.

I add the dart legs with a pencil (don't use a pencil if you have a sheer or light coloured fabric as it could show through, use a fabric marker instead).

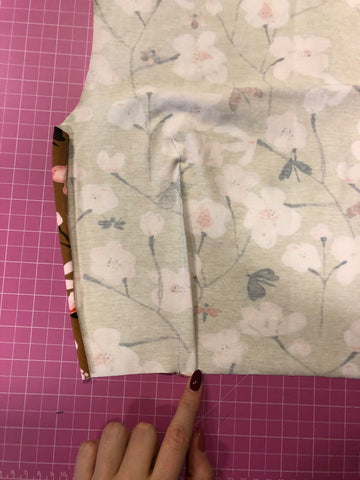
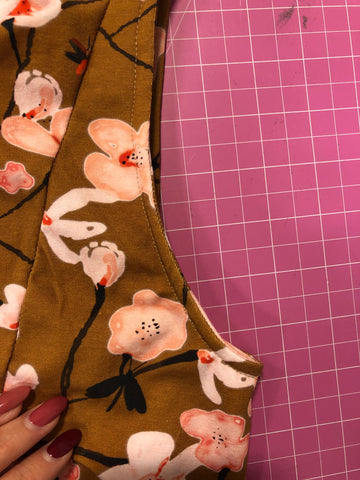
STEP 3. Sew the darts on the back piece. Use a straight stitch with stretch needle. You can leave the ends loose or tie them in to a knot to secure them. Press darts towards center back.

STEP 4. Sew front pieces together. 
Place center front and side front pieces right sides together. Make sure to line up the bust notch.

Sew with zigzag stitch or use an overlocker (serger).


Press shoulder seams towards the back before sewing the shoulder seam.

STEP 6. Continue to sew the side seams of the bodice. Sew with zigzag stitch or use an overlocker (serger). Right sides together.

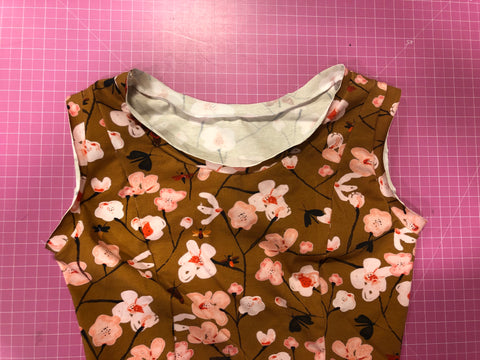
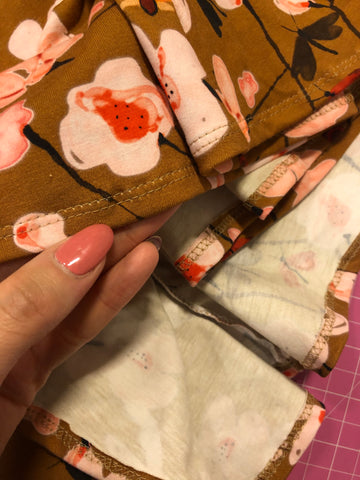
STEP 7. Neckline binding and armhole bindings. First create circles from the binding pieces.
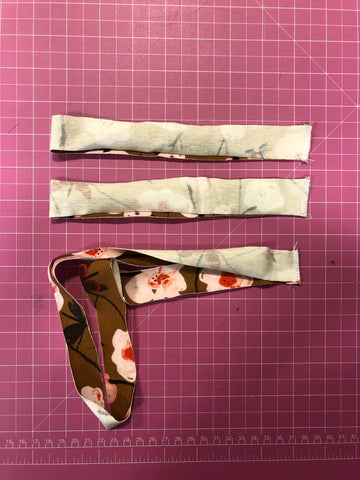
Sew the short end right sides together with straight stitch and stretch needle on your regular sewing machine. Or use an overlocker/serger for this step.

Split each binding in to 1/4. You can mark with pins. Do the same to the armholes and the neckline. The armholes will have marks at the shoulder seam and the armhole depth point. Then you can split front armhole and back armhole in to two. The neckline is a bit different because the front neckline is longer than the back neckline. Choose a point where you start and mark the half point (right shoulder on the illustration). Then you can mark the 1/4 points from there.


Attach the bindings to armholes and neckline, right sides together. Use a zigzag stitch to attach binding since it is less bulky than overlocking, so it’s easier to fold. Here I used overlocking though.


If you have any questions about this pattern, feel free to reach out! I'm here for you and I will help you :)
Until next time,
Happy sewing!
/Josefine
Ploen Patterns


0 comments