
Follow along step by step as I'm sewing the Freja dress. This is part 2 of 2.
You can find part 1 of the sewalong here.
Freja is my free PDF sewing pattern and also the first pattern I ever created. I have learned a lot since then and I have also extended my size range. Freja is now available in the complete Ploen Patterns size range (12 sizes). To celebrate this I thought it would be a great time to create a sewalong blog series. Let's go!
Freja dress PDF Pattern.
My fabric: I'm using this fabric from Storrs London called Isabel Navy Multi for my Freja dress. In collaboration with them I am offering you a discount code for 20% off your purchase! How great is that? Use code PLOEN1 at checkout when buying any of their gorgeous cotton lawn fabrics!
STEP 12
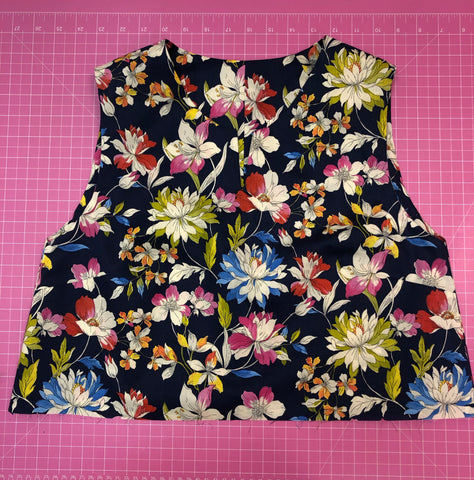
Now sew side seams and the center back seam right sides together. Making sure the armhole seams match. And that the back neckline seams match. This can be tricky so make sure to check an extra time and pin a needle where the seams meet. Press seam allowances, turn to right side and press again.
Sew the side seam:

Clip to reduce bulk:

Press seam allowances open:

Do the same to the center back seam and then turn. Press the whole bodice again.
STEP 13
This is a good time to do the topstitching of your choice - or skip it. Do take into consideration that your garment will be easier to wash and press if you have some kind of stitching around edges to ensure that everything stays in place. However it’s not necessary if you prefer ‘that clean look’. Topstitch 0.1 cm - 2 cm from the edge, or however wide you want it to be! On the Freja dress sketch it’s quite a wide topstitching around the neck and none on the armholes. On my version this time I skipped the topstitching. I think it would look great if you use a solid fabric for your Freja for example. Topstitching wouldn't really do anything for this print and I wanted to keep it clean.
Note: This is not in the original instructions but it is helpful to baste the bodice and the bodice lining together at this point to keep both layers in place before attaching the waistbands.

STEP 14
Assemble both waistband pieces and bodice piece into a “hamburger” like this for the front piece and the back piece. Sew together. The bodices are now sewn together at the sides all the way to the waistbands where they hang loose. This is to provide loops for the belt to pass through.

Place the outer waistband piece right sides together with the bodice. Place the inner waistband piece on the other side of the bodice (right side of waist piece to right side of bodice lining). This might be confusing. Try to pin and fold over to see that it looks correct.

Press waistbands down away from the bodice.

STEP 15
Overlock side seams and back seam on the skirt pieces.


If you don't add pockets: sew skirt pieces together (center back and side seams). If you are adding pockets - only sew the center back seam of the skirt. Then start by placing the pocket pouches right sides together with the skirt pieces. I placed mine 10 cm down from the waistline. The front skirt should have one pocket to the left and one to the right and the back pieces should have a pocket along the side seam, right sides together.

Sew the pocket to the skirt. Start and end 1cm (3/8") from the edge. Use a little smaller seam allowance than 1cm (3/8"). Just inside of that measurement.

Press pocket away from the skirt.

Place back skirt piece right sides together with front skirt. Match the front skirt to the back skirt at the side seam. Pin right sides together making sure the pockets line up. In one continuous stitch, sew from the waistline to your pocket stitch, pivot and sew around the pocket and pivot again and then continue to the hem.

Clip the seam allowances like this. Press the pocket toward the center front. Press the seam allowances open above and below the pocket.

STEP 16
Sew ‘inside’ waistband piece (1) together with skirt piece. Press seam allowance of ‘outside’ waistband piece (2) down.


Pin the outer waistband to skirt piece to create the loop for the belt. Make sure the openings at the side seams are neat and even.

Topstitch in place from the right side of the dress.


STEP 17
Press. Everything.
STEP 18
Fold the belt pieces lengthwise. Sew around the edge and leave a gap open to be able to turn the belt.


Cut corners to reduce bulk and ideally press seam allowances on the point presser before turning.

Turn the belt to the right side.

Press the belt. Then Topstitch around the whole belt. Conveniently closing the gap in the process. Repeat this process for the second belt.

STEP 19
Hem the skirt. Since I added 2 cm seam allowance I fold 1cm twice. Then I stitched it down from the wrong side of the fabric.


Sew the hem:

Pull the belts through the waist. I used a big safety pin to make it easier to feed the belt through. Tie the bows at the side!


STEP 20
Final pressing! DONE!!! Now wear your Freja dress with pride :)

Don’t forget to share your make on social media!
#PPFrejaDress @ploenpatterns
Hope you enjoyed the sewalong :)
Leave a comment below or send me an email (josefine@ploenpatterns.com) if you need help with anything or have any questions at all. I'm here for you!
♥ ♥ ♥
Josefine
Ploen Patterns


0 comments